Flashlight with software
So, you know when you are tired or bored and you go to strange places online? I somehow found this flashlight online and from the picture, you can see many high power LEDs + many high power batteries + adequate cooling => awesome light output. The price at that time was ~50$ so I ordered because it seemed I get a lot for my money.
As a technical guy, I see 10x CREE XM-L T6 and I go straight to the datasheet to see what that is about. It looks like one LED is able to output 692 lumens at 2A and 3.2V. This is the rated power but the datasheet also suggests it can be overdriven too, so I could speculate one of these LEDs can reach 1000 lumens. 10 of these would output 10000 lumens and they would consume either MANY amps (in parallel) or volts (in series).
Anyways, from the theoretical (not the advertised) specs it looks like a 100W LED flashlight which can output 10.000 lumens. This should be great.
I ordered, it arrived, and it wasn’t great. The light output was not impressive so I disassembled it to see what’s up.
Principle of operation
All those LEDs are in parallel so to reach max output it should draw more than 20A and that’s insane. That’s also at the very limit of the 4 parallel 18650 cells but I guess in theory it should be OK to go to maximum for a few seconds. A quick measurement revealed it draws under 1A, so something is clearly not right.
Looking at the electronics we can quickly deduce it works like this:
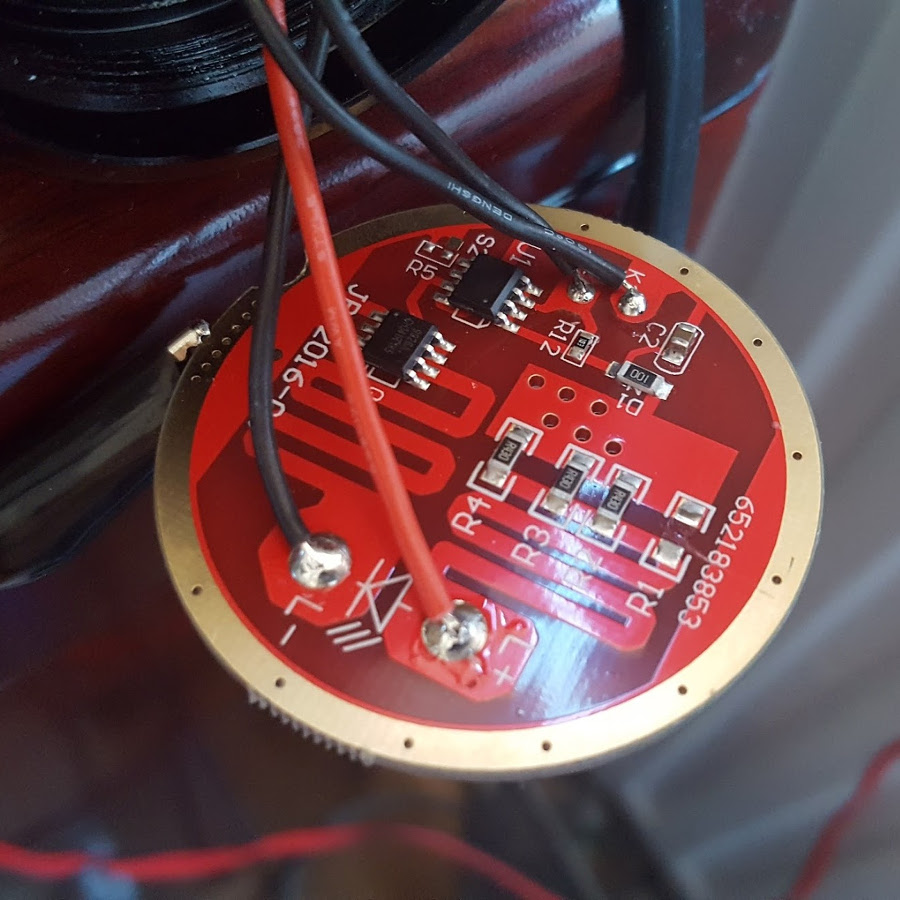
- Pressing the button is registered by the microcontroller.
- The microcontroller switches the MOSFET on/off. By changing the amount of time the FET is ON vs OFF the light output can be controlled.
- Some resistors limit the current flow between batteries, MOSFET and LEDs.
More is less
The first thing to try is shunting those resistors so more current will flow to the LEDs. I can immediately see the light is way brighter and now it’s drawing around 3A. It’s not even close to the expected maximum not now at least is nice.
I played with it for a little more and suddenly it was dead. No smoke or something like that, it just didn’t work anymore.
Probing the circuit a little I was able to determine the microcontroller was faulty. If it was the MOSFET then I could easily replace that and get it working. The microcontroller had no markings and I had no software to flash to it anyway. Before I abandon this I decided to hook the LEDs directly to the bench power supply to see how much light can these actually deliver and it seems not more than 4A. It seems the LEDs are also fake. :)
I clearly didn’t get what I paid for.
Less is more
One year has passed, and that weekend when I made time to do something different arrived.
The footprint of an ATtiny13 matches what used to be on that board so I incorrectly assumed it should fit right in. Reality is that it doesn’t even match the VCC and GND pins but it’s OK; we cut a few traces, bypass with a few wires and we make it work.
Basically, we need to power the ATtiny13, connect the MOSFET to a pin that can be used for PWM (pin 5 or 6) and the button to a digital IO pin which is pretty much any other pin.
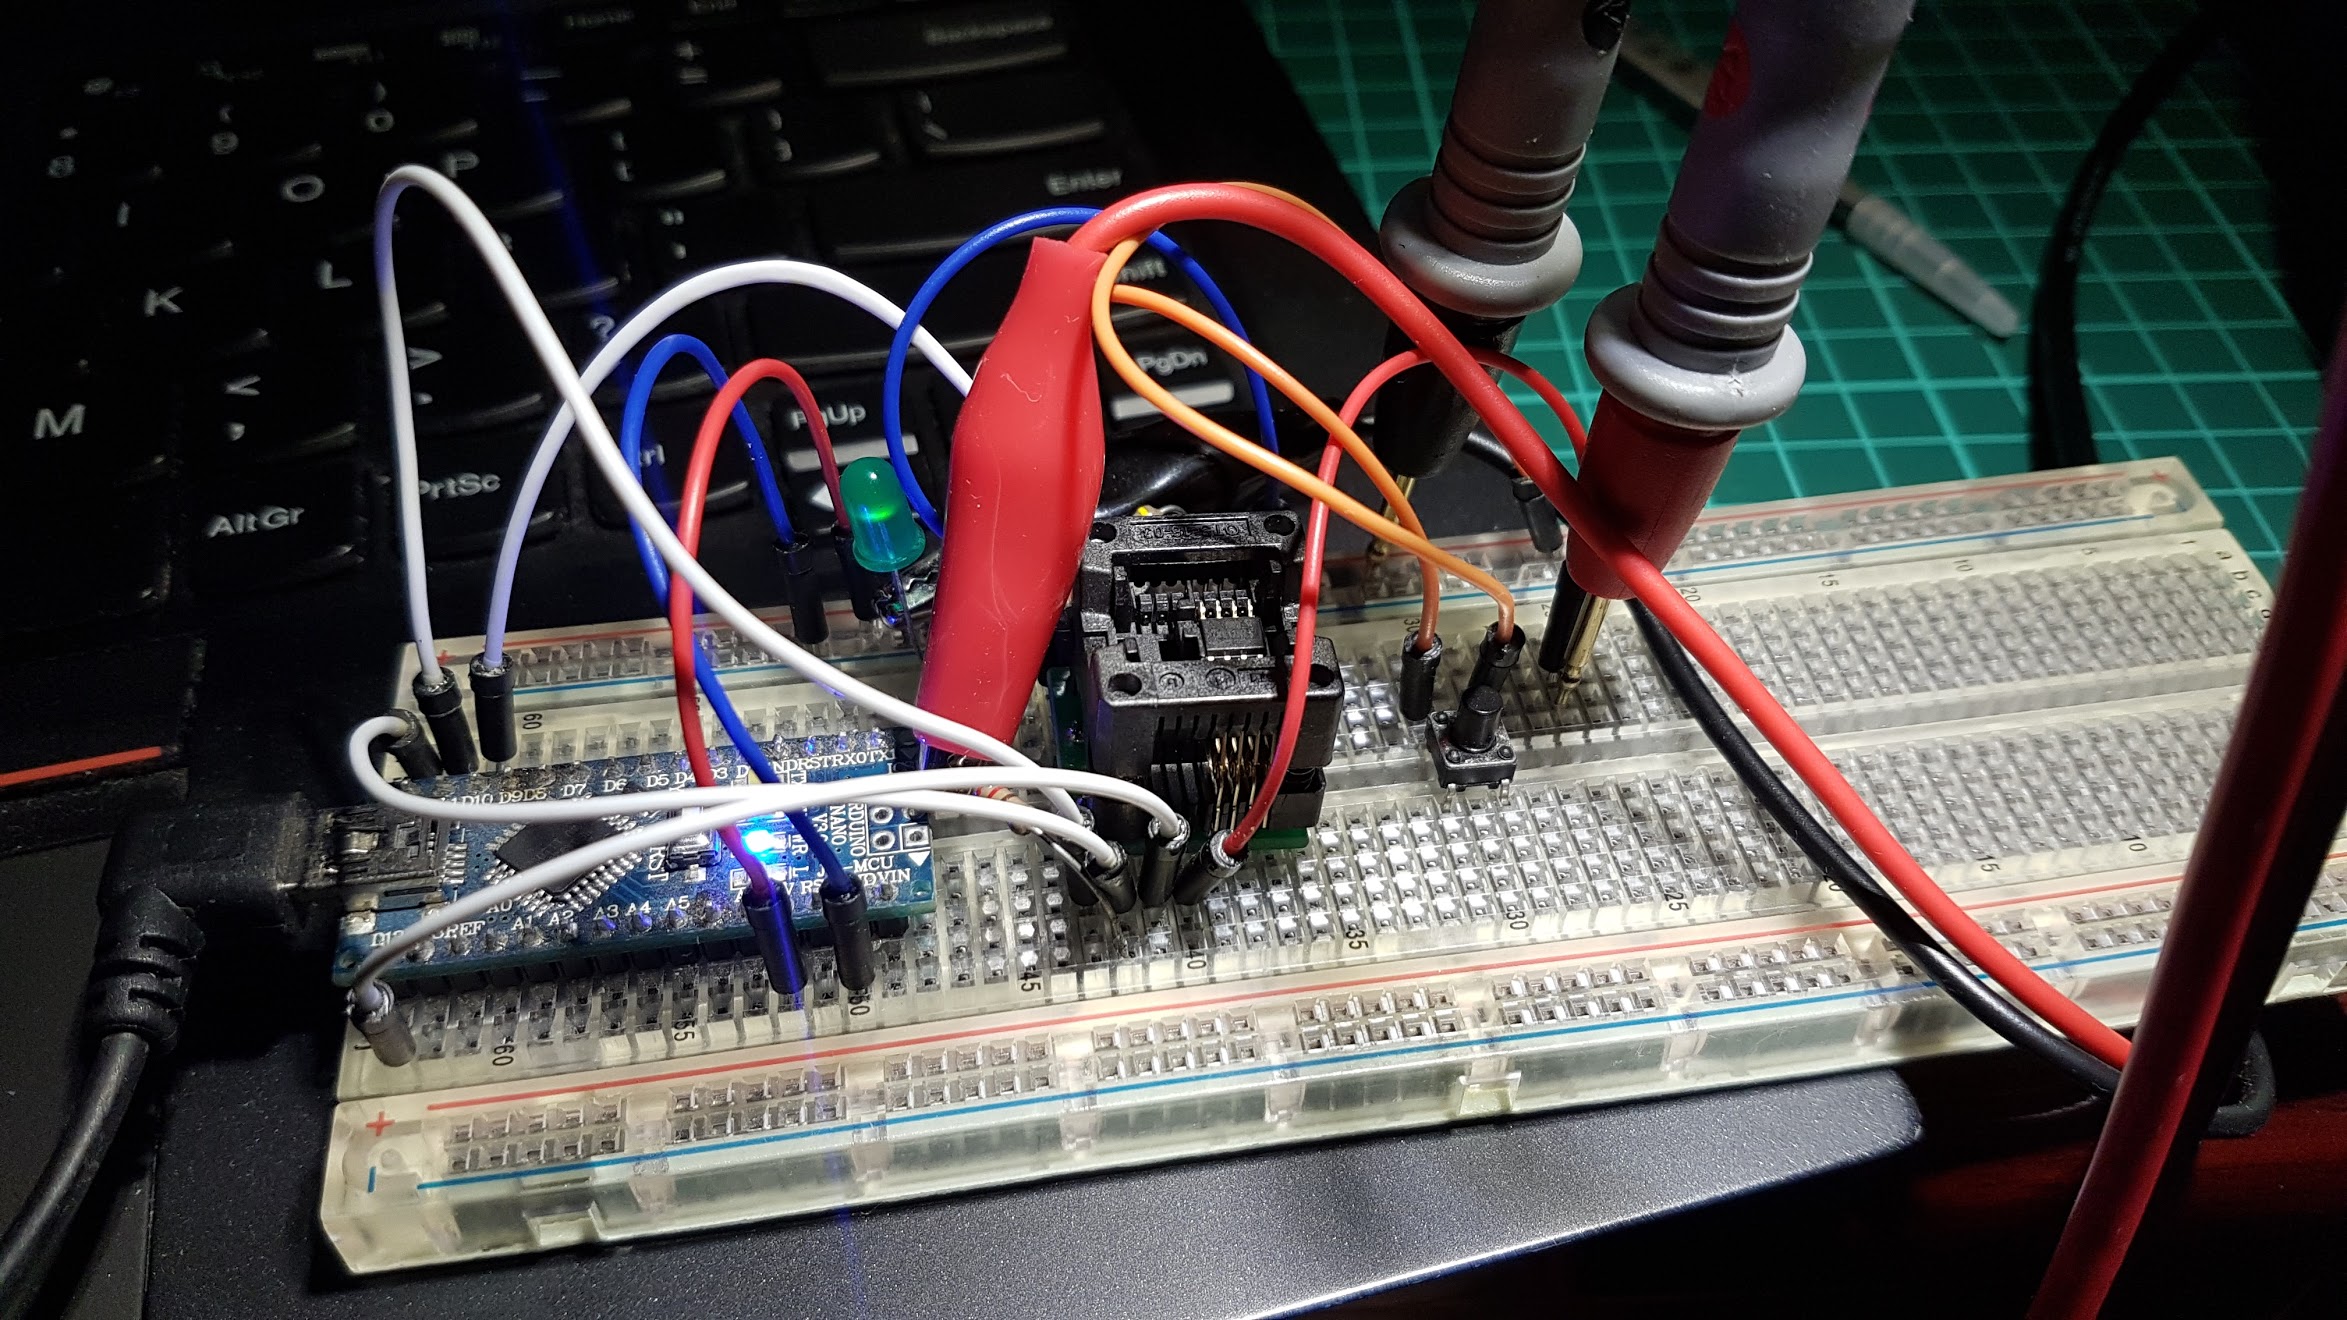
I made this simple programming rig where I used an Arduino nano as an ISP and connected a button and an LED to the ATtiny13.
Code
All I want from this flashlight is to be able to control the light intensity.
- I keep the button pressed from Off and the light starts ramping up.
- I keep the button pressed from On and the light reverses until it turns off.
That’s easy to use for everyone and easy to implement.
I have an array of 16 intensity values which should be somehow logarithmic since perception of light is not linear. We go through those every 100ms and when you lift the finger of the button light stays at that level.
Initially, the array had 64 values for much smoother ramping but ATtiny13 doesn’t have enough RAM for that. :)
The signal that is sent to the MOSFT when the button is pressed looks like this:
With this code, the microcontroller works all the time it’s powered. Fortunately this micro is not power hungry.
Just as a quick and easy power saving method I disable the ADC and the Analog comparator to save 25% energy and if I configure it to work at 1.2MHz instead of the default 9.6MHz. This cuts the energy consumption in half once more. It now uses under 1mA so it’s good enough for now.
End result
After fitting our new microcontroller on our board, it looks like this:
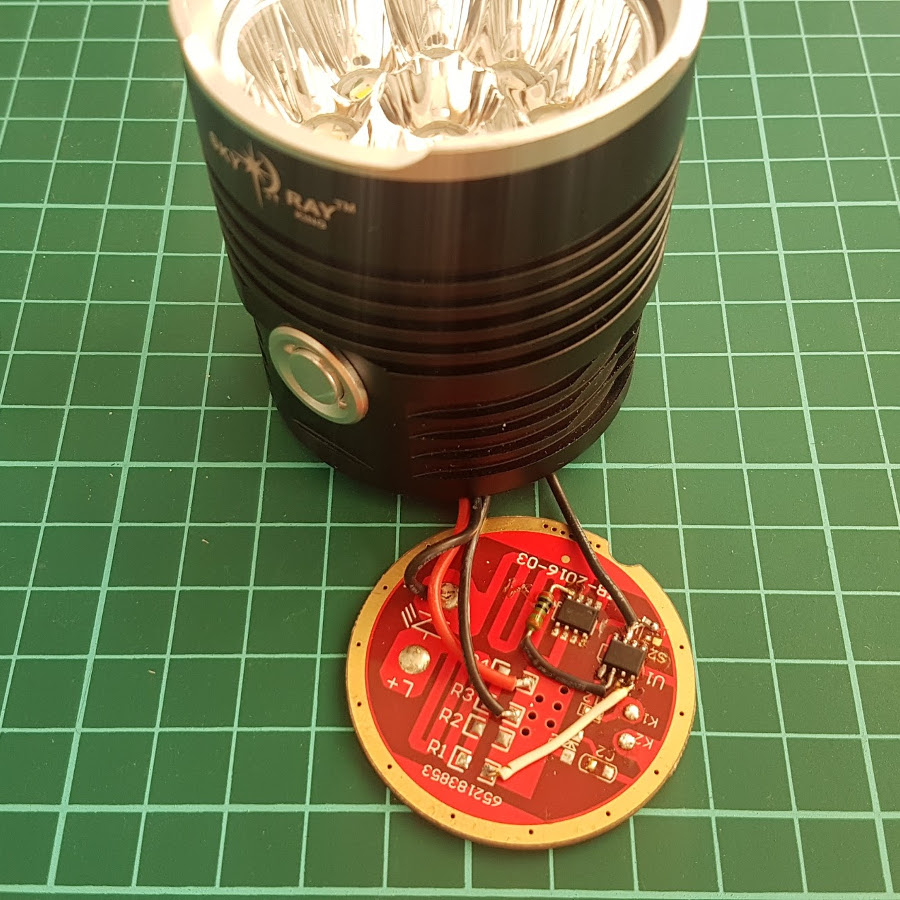
… and the end result looks like this:
 I actually press the button twice. Once to go to max and again to go from max to zero.
YEAH! The flashlight is alive again!
Possible improvements
- Read the battery voltage with the ADC and reduce the output or produce a warning strobe when the voltage is too low.
- When the flashlight is off power down the microcontroller and wake it up with an interrupt when the button is pressed. This would improve the standby time a little.
- Automatically reduce the output from 100% to 50% after a number of minutes. This should help a lot with heat and battery life.
- Go hardcore and make another board which can accommodate more MOSFETs for better power dissipation, temperate sensor and ATtiny85 which has more memory.
Since the flashlight is usable now, I am going to stop here but if I was to develop a product, I would definitely do those improvements.